Create an LBR
- Thomas Watteyne
- Marcelo Barros de Almeida
- Thomas Watteyne
Using the eBox
This is our preferred OpenLBR hardware. This fanless computer is intended to be mounted behind monitors in airports. It contains a 1GHz processor, and comes in many flavors (see list ). All can run Windows XP and Linux. We are using the eBox-3300 (256MB RAM) and the eBox-3310-L2 (512MB RAM, 2xLAN, 2xRS-232).
- buy an eBox.
- We highly recommend you also buy a 4GB+ industrial Compact Flash card; they support much more read/write cycles than the usual cards.
Debian 5 installation on the eBox-3300
Debian 5 runs on the eBox-3300, but there are a few tricks you need to follow to have everything working. It took us some time to figure all of them out, so please follow the steps below carefully before contacting us. Note that the manufacturer has also put an installation tutorial for Debian 4, but which is less complete than the instructions below.
If you find a mistake in the steps below, please contact Thomas Watteyne.
The following instructions are really detailed on purpose; there is, however, nothing complicated about them. Installing everything should take about 2 hours of your time.
Step 1: prepare for installation
- Download the latest netinst distribution of Debian; pick the image which is 180MB in size, for the i386 architecture. In our case, we used debian-506-i386-netinst.iso.
- burn that ISO image onto a CD (a 210MB pocket CD will do); on Windows, you can use the excellent DeepBurner.
- connect to you eBox:
- a formatted Compact Flash card;
- an external USB CD drive;
- a screen;
- an Ethernet cable (connected to a DHCP-enabled network with connectivity to the Internet);
- a keyboard;
- Note: you don't need a mouse as we will not install any graphical interface.
Note: it is important for your Compact Flash card to be formatted. It doesn't matter what format you're using, but there should be no Operating System on there your eBox can understand and boot on. Sure, you can play with the BIOS settings to force the eBox to boot on the CD, but the easiest way is simply to erase the Operating System from the Compact Flash card, if there is one on there.
Step 2: install Debian 5 "out-of-the-box"
- Put your newly-burnt CD into the drive and switch the eBox on; you should reach Debian's Installer boot menu screen.
- Choose Advanced options > Expert Install. This is because the kernel the CD will install will not recognize the Ethernet card, and will be "lost" by that.
- Once you see the Debian installer main menu, choose Configure the network:
- Choose Detect network hardware;
- answer No to Start PC card services;
- answer No to Load missing drivers from removable media?;
- you will get an error message Ethernet card not found. This is normal. Choose Continue;
- you then get an error message Installation step failed. This is normal. Choose Continue.
- Once you're back in the Debian installer main menu, choose Load installer components from CD:
- Answer No to Start PC card services;
- the installer scans the hardware and inform you that it has detected a CD-ROM, in our case
CD-ROM detected. The CD-ROM autodetection was successful. A CD-ROM drive has been found and it currently contains the CD Debian GNU/Linux 5.0.6 "Lenny" - Official i386 NETINST Binary-1 20100905-11:24. The installation will now continue.; - this is perfect, Choose Continue;
- do not select anything from the list of Installer components to load; choose Continue;
- a progress bar appears for Loading additional components, for about 30s.
- Once you are back in the Debian installer main menu, choose Set up users and passwords:
- Answer Yes to Enable shadow passwords?;
- answer Yes to Allow login as root?;
- enter your root password twice;
- answer Yes to Create a normal user account now?;
- pick a Full name, a username, and a password (which you enter twice).
- Once you are back in the Debian installer main menu, choose Install the base system:
- Select Partition disks;
- select Detect disks;
- answer No to Start PC card services?;
- pick Guided - user entire disk;
- pick the one disk it sees, in our case
IDE2 master (hdc) = 4.2 GB InnoDisk Corp. - iCF4000 4GB; - If the installer does not find any disks and presents you with a list of drivers, go through the following step:
- switch your eBox off and on again;
- at the very first screen, you should see your CF card listed as IDE secondary master device;
- switch your eBox off and on again;
- at the very first screen, press Delete to enter the BIOS setup menu;
- in the BIOS, set the IDE mode to legacy.
- pick All files in one partition (recommended for new users);
- select Finisg partitioning and write changes to disk;
- select Yes at the questions Wirte the changes to disks?;
- you will get a Partitions formatting progress bar for about 1min;
- you will get a Installing the base system progress bar for about 5min;
- at the question Kernel to install, answer linux-image-2.6-486;
- you will get a Installing the base system progress bar for about 30s;
- at the question Drivers to include in the initrd, answer generic: include all available drivers;
- you will get a Installing the base system progress bar for about 2min.
- Once you are back in the Debian installer main menu, choose Install the GRUB boot loader on a hard disk:
- at the question Install GRUB 2 instead of GRUB Legacy?, answer No;
- you will get an Installing GRUB boot loader progress bar for about 30s.
- at the question Install the GRUB boot loader to the master boot record?, answer Yes;
- you will get an Installing GRUB boot loader progress bar for about 30s.
- do not specify a GRUB password, simply pick Continue;
- Once you are back in the Debian installer main menu, choose Finish the installation:
- at the question Is the system clock set to UTC?, answer Yes;
- in the Installation complete window, remove the CD, pick Continue.
- Let your eBox reboot, you should end up with the following prompt
Debian GNU/Linux 5.0 localhost tty1

locahost login:
Step 3: updating to a new kernel
The kernel which the Debian installer installed provides no support for the Ethernet card of the eBox (the kernel module which is missing is called r6040.ko). You hence have to replace the kernel with a better and newer one. The easiest option is to use one from http://www.compactpc.com.tw/.
- log into your newly installed Debian 5.0 eBox as root
- download ftp://vxdx:gc301@ftp.dmp.com.tw/Linux_DEMO/linux-image-2.6.34.1-vortex86-sg_1.0_i386.deb (6.2MB) onto your office computer and copy the file onto a USB key. This is the new kernel.
- plug the USB key into your eBox and type the following commands to copy the kernel image onto your eBox
# mount /dev/sda1 /mnt
# cp /mnt/linux-image-2.6.34.1-vortex86-sg_1.0_i386.deb /tmp/
# umount /mnt/
- you can now remove the USB key from your eBox
- type the following commands to install the kernel image
# cd /tmp/
# dpkg -i linux-image-2.6.34.1-vortex86-sg_1.0_i386.deb
# rm linux-image-2.6.34.1-vortex86-sg_1.0_i386.deb
# cd /boot/
# mkinitramfs -o initrd.img-2.6.34.1-vortex86-sg 2.6.34.1-vortex86-sg
# update-grub
# vim /boot/grub/menu.lst
- in that file, change the lines
title		Debian GNU/Linux, kernel 2.6.34.1-vortex86-sg
root		(hd0,0)
kernel		/boot/vmlinuz-2.6.34.1-vortex86-sg root=/dev/hdc1 ro all_generic_ide
initrd		/boot/initrd.img-2.6.34.1-vortex86-sg

title		Debian GNU/Linux, kernel 2.6.34.1-vortex86-sg (single-user mode)
root		(hd0,0)
kernel		/boot/vmlinuz-2.6.34.1-vortex86-sg root=/dev/hdc1 ro all_generic_ide single
initrd		/boot/initrd.img-2.6.34.1-vortex86-sg
to
title		Debian GNU/Linux, kernel 2.6.34.1-vortex86-sg
root		(hd0,0)
kernel		/boot/vmlinuz-2.6.34.1-vortex86-sg root=/dev/sda1 ro all_generic_ide
initrd		/boot/initrd.img-2.6.34.1-vortex86-sg

title		Debian GNU/Linux, kernel 2.6.34.1-vortex86-sg (single-user mode)
root		(hd0,0)
kernel		/boot/vmlinuz-2.6.34.1-vortex86-sg root=/dev/sda1 ro all_generic_ide single
initrd		/boot/initrd.img-2.6.34.1-vortex86-sg
This is because in this new kernel, your Compact Flash is called sda1, not hdc1. Also, your USB key, which used to be called sda1, is not called sdb1.
- type the following command:
# shutdown -r now
- Your eBox reboots, and defaults to the new kernel (2.6.34.1-vortex86-sg).
- Log in as root, and type
# uname -r
- if youget the following answer, you have successfully installed your eBox and upgraded its kernel
# 2.6.34.1-vortex86-sg
Step 4: finalizing the installation
There are a number of administrative tasks to do:
- enable the Ethernet card:
- type
# echo -e "auto eth0\niface eth0 inet dhcp" >> /etc/network/interfaces
# shutdown -r now
- if you have an eBox-3310-L2 (with two Ethernet cards), also type
# echo -e "auto eth1\niface eth1 inet dhcp" >> /etc/network/interfaces
# shutdown -r now
- reboot your eBox
# shutdown -r now
- after reboot, log in as root, and type:
# ifconfig eth0 Link encap:Ethernet HWaddr 00:1b:eb:20:13:45 inet addr:128.32.33.137 Bcast:128.32.33.255 Mask:255.255.255.0 inet6 addr: fe80::21b:ebff:fe20:1345/64 Scope:Link UP BROADCAST RUNNING MULTICAST MTU:1500 Metric:1 RX packets:1812 errors:0 dropped:0 overruns:0 frame:0 TX packets:212 errors:0 dropped:0 overruns:0 carrier:0 collisions:0 txqueuelen:1000 RX bytes:167623 (163.6 KiB) TX bytes:21733 (21.2 KiB) Interrupt:7 - you should see the configuration of eth0. If it is connected to a network running DHCP, you should also be able to see its IPv4 address.
- If you have an eBox-3310-L2, you will also see the configuration of eth1. On our model, eth0 is on the RJ45 port closest to the USB port; eth1 is closest to the power plug.
- type
- configure the packet sources and update Debian:
- open /etc/apt/sources.list. If should contain one line referring to the cdrom. Remove that line and leave only the following:
deb http://http.us.debian.org/debian stable main
- then type following command:
# aptitude update
- open /etc/apt/sources.list. If should contain one line referring to the cdrom. Remove that line and leave only the following:
- have your eBox adjust its clock from the Internet:
# apt-get install ntp
That's it, you now have a working eBox with a recent kernel. The command free tells you that it is running with 23MB of RAM; the command df tells your that you're using 384MB of hard-drive.
Using the Linksys NLSU2
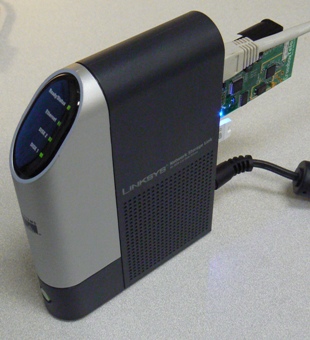
This is the old method we used. The NSLU2 is not manufactured anymore, and the eBox 3300 is better and cheaper hardware. This device is initially a used to share USB hard drives onto a Windows network. A community of enthusiasts have ported several flavors of Linux onto that platform, turning it into a small computer.
- buy a Linksys NSLU2. You will also need a 2GB+ USB key or USB harddrive.
- reprogram it with Debian by following this tutorial. It consists in replacing the Linksys firmware with a Debian installer, and running the installer. Full installation takes about 4 hours (you can leave it running).
- you can connect to it through SSH. If you're using PuTTY for Windows, you can specify the user used to connect to it in Connection > Data > Auto-login username (click Save after you enter a username for PuTTY to remember).
If everything works, go on to Set Up Tunneling.
Related content
