IAR
- Thomas Watteyne
- Thomas Watteyne
- Xavier Vilajosana
IAR can be used as the development environment for the following platforms:
- MSP430-based
- ARM Cortex-M3 based
IAR is a very well-established tool chain for programming embedded devices. It allows you to edit the code, recompile, program a board and debug using JTAG. You need to install the MSP430 or ARM Cortex-M3 version depending on the platform you are working with.
IAR is a commercial product, which you have to pay for. IAR has agreement with many academic institutions, so it might be worth contacting IAR to ask whether such a agreement is possible in your case.
There are two free versions of IAR:
- a version which limits the size of the binary. This will not work with OpenWSN since the binary is larger than the limit.
- a full-featured 30-day evaluation licence
Versions
We use the following versions in the OpenWSN team:
| tool | version |
|---|---|
| IAR Embedded Workbench for MSP430 | 5.60.1 |
| IAR Embedded Workbench for ARM | 6.60.2.5507 |
Installing
IAR comes in multiple flavors:
- the full version is (obviously) the best. You need, however, to buy a license. In many cases, your university/company might already have one. If you're a student/researcher, you might be able eligible for a discount.
- 30-day evaluation version is exactly the same as the full version, but you can only use it for 30 days. You can use this version while your license request is being processed.
- IAR Kickstart Edition for MSP430 is a version of IAR which allows you to compile applications which occupy at most 4kB of flash space (which is smaller than the OpenWSN stack). Note that you can use this version to load larger pre-compiled binaries. There is no time limit.
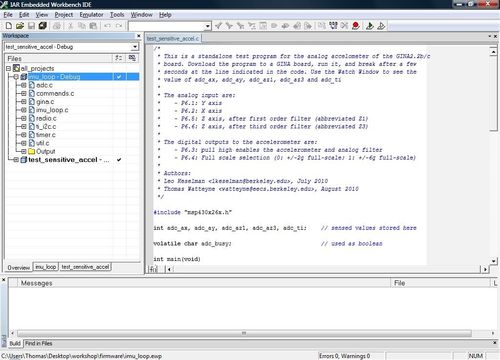
After the installation, in your openwsn-fw directory (installed as part of the downloaded from GitHub as described here) double-click on firmware/openos/projects/<platform>/file.eww. You see a window similar to the one below.
Building and Loading
If you've just received new GINA boards, you need to recompile the OpenWSN stack and load the binary onto the board using IAR. Follow these steps:
- Connect the MSP-FET430UIF to your computer. Its LEDs starts blinking. If you have IAR installed, Windows will automatically install the drivers.
- Connect the GINA-JTAG-adapter onto the MSP-FET430UIF.
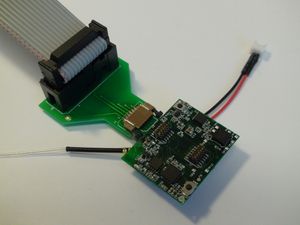
- Insert the GINA board into the GINA-JTAG-adapter.
- Open
openwsn/firmware/openos/projects/gina/gina.eww. Once the workspace is open, several projects are listed on the left. - Right-click on the project called
test_leds_xtaland selectSet as active.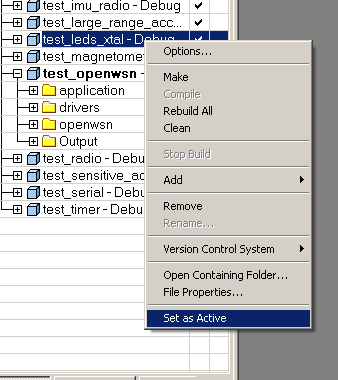
- Once this project becomes active (bold), compile and download the application onto the board by doing once of the following:
- (preferred) press
Ctrl+d - click on the
Download and Debugbutton - select
Project > Download and Debug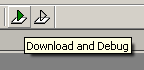
- (preferred) press
- IAR will do the following:
- your source code gets compiled and linked (follow the activity on the bottom)
- the resulting binary is downloaded onto the board (a progress bar shows up)
- your code starts executing
- By default, IAR places a breakpoint at the very beginning of your code (function
main()) so you can prepare breakpoints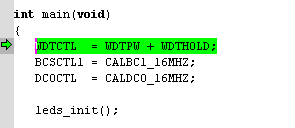
- to start execution, do one of the following:
- (preferred) press
F5 - click of
Gobutton - select
Debug > Go
- (preferred) press
- The LEDs of your board blink, which is part of the normal behavior of the
test_led_xtalprogram.
Follow the same steps to reprogram the board with whichever of the projects.
If you've just received new TelosB board, you need to recompile the OpenWSN stack and load the binary onto the board using IAR. Follow these steps:
- Connect the MSP-FET430UIF to your computer. Its LEDs should start blinking. If you have IAR installed, Windows will automatically install the drivers.
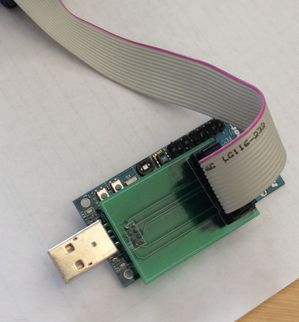
- Connect the TelosB Adapter onto the MSP-FET430UIF.
- Connect the TelosB board into the TelosB-adapter, as shown below.
- Connect the TelosB to the USB port of your computer.
- Open project
openwsn/firmware/openos/projects/telosb/telos.eww. Once the workspace is open, projects are listed on the left. - Right-click on the project called
test_leds_xtaland selectSet as active. - Once this project becomes active (bold), compile and download the application onto the board by doing once of the following:
- (prefered) press
Ctrl+d - click on the
Download and Debugbutton - select
Project > Download and Debug
- (prefered) press
- You should see the three following activities:
- your source code gets compiled and linked (follow the activity on the bottom)
- the resulting binary is downloaded (a progress bar shows up)
- you code starts executing
- by default, IAR will stop executing at the very beginning of your code (function
main()) so you can prepare breakpoints - to start the execution|do one of the following:
- (preferred) press
F5 - click of
Gobutton - select
Debug > Go
- (preferred) press
- The LEDs of your board blink, which is part of the normal behavior of the
test_led_xtalprogram.
Follow the same steps to reprogram the board with whichever of the projects.
Related content
