This page is under construction!
This page details how to run a full OpenWSN experiment on the ioT-LAB testbed.
We will use the setup depicted below:
Prepare the server
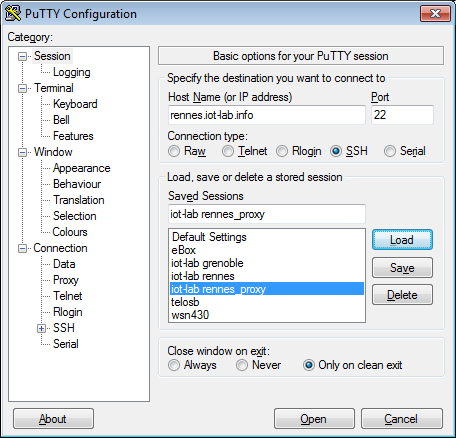
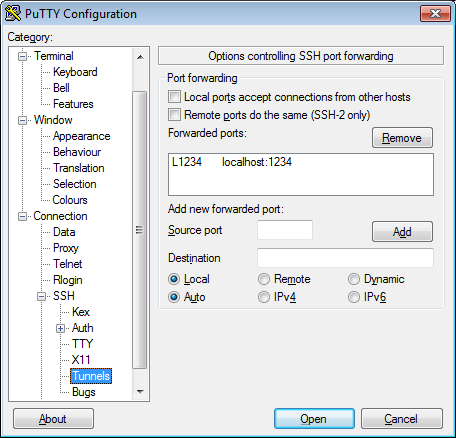
SSH connection with tunneling
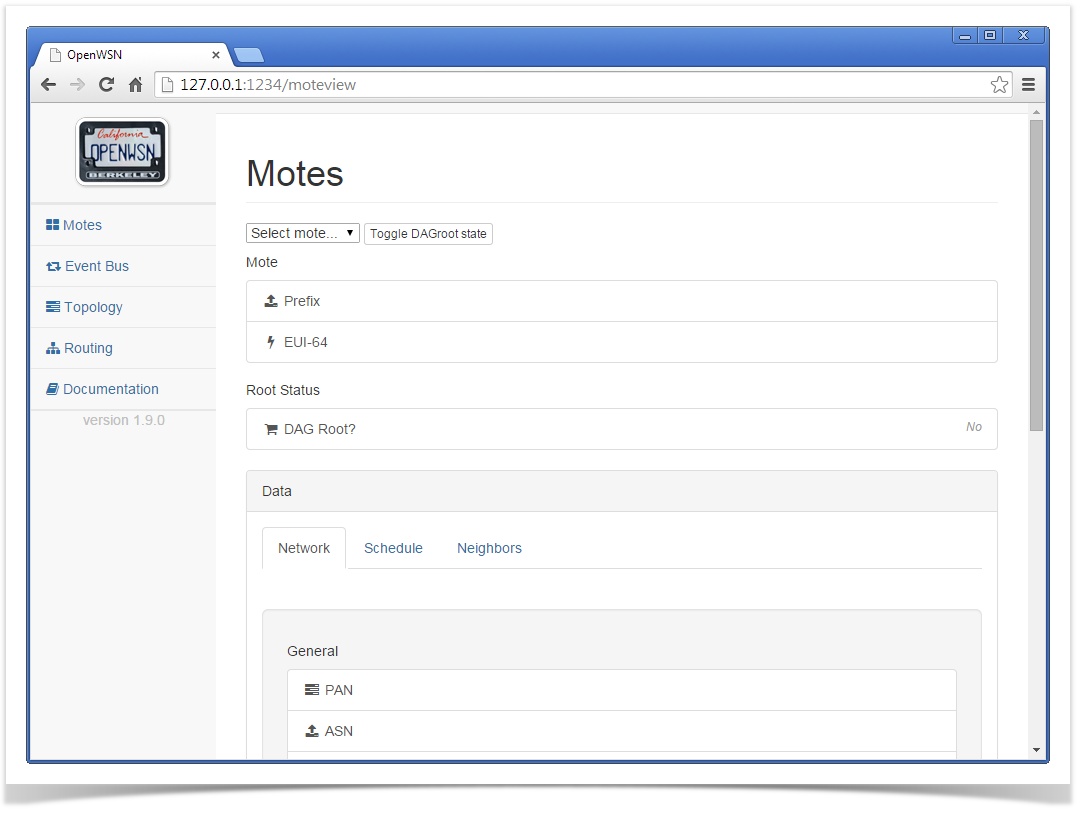
We tunnel TCP port 1234 from the server to the host.
Ungrade to Python 2.7
wget https://www.python.org/ftp/python/2.7.9/Python-2.7.9.tgz
tar zxvf Python-2.7.9.tgz
cd Python-2.7.9/
./configure
mkdir -p ~/usr/local
make altinstall prefix=$HOME/usr/local exec-prefix=$HOME/usr/local
cd ~/usr/local/bin/
ln -s python2.7 python
PATH=~/usr/local/bin:$PATH
cd ~
python --version
install pip and virtualenv
cd ~
wget --no-check-certificate https://bootstrap.pypa.io/get-pip.py
python get-pip.py --user
.local/bin/pip install --install-option="--user" virtualenv
export PATH=~/.local/bin:$PATH
Create a Python virtual environment
cd ~
virtualenv venv
Download openwsn-sw
cd ~
git clone https://github.com/openwsn-berkeley/openwsn-sw.git
Install OpenVisualizer requirements
cd ~
source venv/bin/activate
cd openwsn-sw/
pip install -r requirements.txt
Start an Experiment
Compile/retrieve binary image
You have the following options for retrieving the binary images:
- rebuild them yourself by running the following command:
for the DAGroot image on the device:
scons board=wsn430v14 toolchain=mspgcc noadaptivesync=1 dagroot=1 oos_openwsn
Save the resulting file as
03oos_openwsn_dagroot.hex.for the non-DAGroot devices:
scons board=wsn430v14 toolchain=mspgcc noadaptivesync=1 oos_openwsn
Save the resulting file as
03oos_openwsn.hex.
The pre-compiled binaries are also attached to this page, see list below.
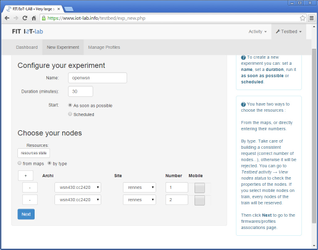
Create Experiment
choose a number of nearby nodes on the same IoT-LAB deployment site
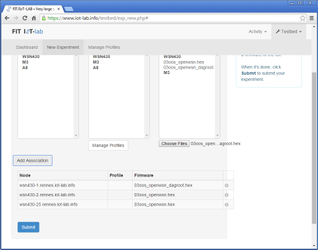
- Associate:
03oos_openwsn_dagroot.hexto the node you want to be DAGroot.03oos_openwsn.hexto the remaining nodes
- Write down their names
Start OpenVisualizer
source venv/bin/activate
cd openwsn-sw/software/openvisualizer/bin/openVisualizerApp/
python openVisualizerWeb.py --port 1234 --iotlabmotes wsn430-1,wsn430-2,wsn430-3,wsn430-25,wsn430-26,wsn430-27,wsn430-49,wsn430-50,wsn430-51
Stop OpenVisualizer
Enter "q" in the OpenVisualizer CLI interface to shutdown the application.
You can now simply disconnect from the server. Alternatively, you call deactivate the Python virtual environment:
deactivate