This pager is under construction. To get things moving faster, contact Thomas Watteyne.
If you are completely new to OpenWSN, and you are using Windows, read this page first. It will walk you through all the steps to install OpenWSN and explore a number of key features.
In particular you will:
- compile and run OpenWSN in simulation mode, ping a simulated mote, and interact with it over CoAP.
- program a TelosB mote, connect it to your computer, ping it, and interact with it over CoAP.
What to bring?
- a computer running Windows. This page is written with Windows 7 Professional.
- optionally, two TelosB motes to play with real hardware.
Download OpenWSN
OpenWSN is a collection of repositories hosted on GitHub. We will download and use the following:
- https://github.com/openwsn-berkeley/openwsn-fw holds the firmware source code which runs on the (possibly emulated) motes
- https://github.com/openwsn-berkeley/openwsn-sw holds the software source code which runs on your computer
- https://github.com/openwsn-berkeley/coap is a Python module which implements CoAP
Oops!
Before you can go on, you need to install a Git client. Any client will do, but we will use tortoisegit.
Once you've installed it, it will integrate nicely with your Windows explorer.
We will download these repositories side-by-side on your desktop using Git:
- right-click on your Desktop, select TortoiseGit > Clone... .
- In the URL, enter https://github.com/openwsn-berkeley/openwsn-fw.git
- repeat for the following URLs:
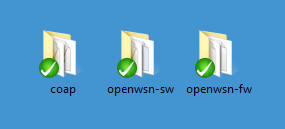
You now have:
At any time you can make sure you are running the latest code by right-clicking on each folder, and choosing Git Pull....
Running a simulation
Frankly, it's a bit strange to start using OpenWSN with a simulation, since the firmware is really meant (and written) to run on real motes. But, not everyone has hardware, not always the same hardware, etc. So to make things nice and easy, we'll start by simulation. Oh, and the simulated code behaves exactly the same as the real code, so what you see now is what you'll get with real hardware.
Prepare
Before we can start running a simulation, we need to compile the firmware as a Python extension. This is all explained in the OpenSim page if you want to know what's going on.
Oops!
Before you can go on, you need to install mingw, which gives you all of the build tools to build the firmware:
- Download from http://www.mingw.org/
- Install at
C:\MingGW\ - Add
C:\MinGW\binto yourPATHenvironment variable Verify you can call the
gcccommand:C:\Users\Thomas>gcc --version gcc (GCC) 4.8.1 Copyright (C) 2013 Free Software Foundation, Inc. This is free software; see the source for copying conditions. There is NO warranty; not even for MERCHANTABILITY or FITNESS FOR A PARTICULAR PURPOSE.
Oops!
Before you can go on, you need to install Python:
- Download Python 2.7.x from https://www.python.org/(NOT Python 3!)
- Add the following directories to your
PATHenvironment variable:C:\Python27C:\Python27\Scripts
Verify you can call
python:C:\Users\Thomas>python --version Python 2.7.5
- Install the Python setuptools from https://pypi.python.org/pypi/setuptools#installation-instructions. Typically, this means downloading a file called
ez_setup.pyand double-clicking on it. Verify that you can call the
easy_installcommand:C:\Users\Thomas>easy_install --version setuptools 1.1.6
Install the
piputility:C:\Users\Thomas>>easy_install pip
Verify that you can call the
pipcommand:C:\Users\Thomas>pip --version pip 1.4.1 from c:\python27\lib\site-packages\pip-1.4.1-py2.7.egg (python 2.7)
Install the OpenWSN Python dependencies (from the
openwsn-sw\directory on your Desktop):C:\Users\Thomas\Desktop\openwsn-sw> pip install -r requirements.pip
Install SCons the build environment:
C:\Users\Thomas\Desktop\openwsn-sw> pip install scons
