Introduction
This tutorial describes how to install and configure mspgcc, mspDebug and Eclipse to program and debug MSP430 microcontrollers on Windows.
What is needed?
- Windows XP, Vista, 7 or later.
- MSP430 USB FET Programmer
Step 1: Download
Step 2: Install
- Unzip eclipse file into some folder you like eclipse to be.e.g C:\eclipse
- Open the zip file of msp430-toolchain and unzip the contents to C:\msp430-toolchain
- Open eclipse and go to Help->Install New Software
- add the following repository to eclipse: http://eclipse.xpg.dk
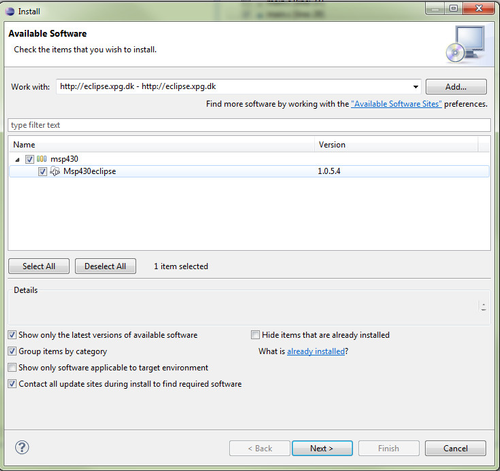
- Install the MSP430 plugin and restart eclipse
- add the following repository to eclipse: http://eclipse.xpg.dk
Step 3: Configure Eclipse
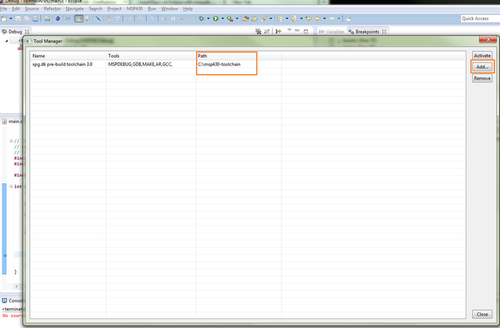
- Configure the toolchain in eclipse. Click the menu MSP430->Tool Manager
- Add the toolchain which is installed in c:\msp430-toolchain or the folder you decided to use.
- Click add and browse to the desired folder. After click Activate
Step 4: Compiling some code
- In order to use the MSP430 features, you have to create a new C or C/C++ project and choose "Empty Project" from the "MSP430 Cross Target Application" group.
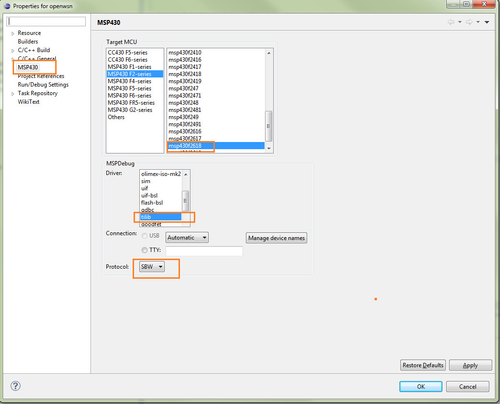
- Right click on the project and go to Properties
- Select the MSP430 tab. Configure your msp430 platform (in my case msp430f2618 as Gina mote uses that uC)
- Select tilib driver
- To create a new source file click on the project folder and select new -> Source file. Name the file e.g main.c
Copy some testing code on it:
sample code#include <io.h> #include <stdint.h> #include "msp430x26x.h" //use your msp430 configuration! int main() { // The main function volatile uint8_t i = 0; WDTCTL = WDTPW + WDTHOLD; P2DIR |= 0x0F; // do forever: while (1) { i++; if (i == 0) { //toggle red led in gina P2OUT ^= 0x08; } } }- In order to compile go to Project -> Build All or press Ctrl+B
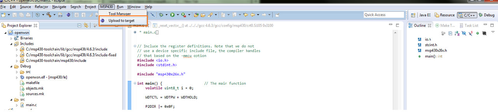
- To program the device go to MSP430 tab and select Upload to Target
Step 5: Debugging
- To Debug with Eclipse click the Debug arrow near the Debug "bug – symbol" on the toolbar
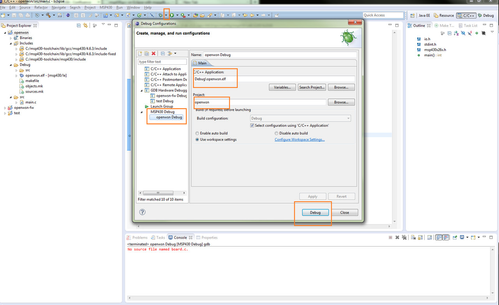
Click Debug button and wait the debugger to start. The code will stop at your main.
NOTE: Make sure to Program the device before debugging using the MSP430 tab and Upload to Target option
Known Issues
- If linker complains about the size of the code that is larger than the available ROM, use -Os compiler optimization flag.
References
TI LaunchPad on Windows link
- Hack a day link
- StackOverflow thread on msp430 on eclipse link
- XPG Eclipse link
- MSPDebug link