...
We will use the setup depicted below:
| Gliffy | ||||
|---|---|---|---|---|
|
Pre-compiled Binary Images
| Attachments | ||
|---|---|---|
|
Prepare the server
SSH connection with tunneling
...
| Code Block |
|---|
source venv/bin/activate cd openwsn-sw/ pip install -r requirements.txt |
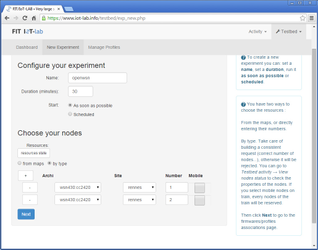
Start an Experiment
Create Experiment
...
| Note |
|---|
| This tutorial is written for the WSN430v14 board only. |
Compile/retrieve binary image
You have the following options for retrieving the binary images:
- rebuild them yourself by running the following command:
for the DAGroot image on the device:
Code Block scons board=wsn430v14 toolchain=mspgcc noadaptivesync=1 dagroot=1 oos_openwsnSave the resulting file as
03oos_openwsn_dagroot.hex.for the non-DAGroot devices:
Code Block scons board=wsn430v14 toolchain=mspgcc noadaptivesync=1 oos_openwsnSave the resulting file as
03oos_openwsn.hex.
- The resulting files are also attached to this page:
Attachments patterns *.hex
Create Experiment
choose a number of nearby nodes on the same IoT-LAB deployment site
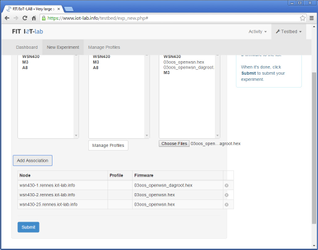
- Associate:
03oos_openwsn_dagroot.hexto exactly 1 nodethe node you want to be DAGroot.03oos_openwsn.hexto the remaining nodes
- Write down their namenames
Start OpenVisualizer
| Code Block |
|---|
source venv/bin/activate cd openwsn-sw/software/openvisualizer/bin/openVisualizerApp/ python openVisualizerWeb.py --port 1234 --iotlabmotes wsn430-1,wsn430-2,wsn430-3,wsn430-25,wsn430-26,wsn430-27,wsn430-49,wsn430-50,wsn430-51 |
...