...
The openstack will build up the whole OpenWSN stack such as the ieee154e protocol or ipv6 protocol. The below code snippet can be found in openwsn-fw/openstack/openstack.c. It basically initializes all the stuff needed in the OpenWSN framework. For the application, openapps_init() is where your application is initialized.
...
You will be developing your application under the directory openwsn-fw/openapps/. For example, there’s an application called uinject under that directory. You can find the function such as uinject_init inside the uinject.c and uinject.h. That basically is what will be called in the openapps_init() to initialize your application.
Assume that you have compiled your program following the steps described below. You can find the openapps_init being defined with your application<application_initinit>(). The below code snippet can be found in openwsn-fw/build/openapps/openapps_dyn.c. This file is generated when you build your project. You can build a project either through the terminal or eclipse. The command will be like
...
Hardware Requirements
Segger Debugger [1]+ ARM-JTAG 20-10 pin converter
two Openmotes
a mimsy from Kris
some wires
Please follow the below snapshot on how to connect the wires. (This is using an openbase, and using an openmote would be similar)
...
Create Your Tutorial App
In this section, we demonstrate a basic routine to create an application in the openWSN framework. Consider the following steps:
Open your Virtual Machine.
Plug openmote/openbase into the computer and press connect to Linux.
...
6. Copy uinject/uinject.c and uinject/uinject.h into tutorial and rename them tutorial.c and tutorial.h.
...
c) In openwsn-fw/openstack/crosslayers/idmanager.c change idmanager_vars.myPanid[0:1] to something unique, such as your birthday month and day.
...
10. In tutorial.h, change the timer period so it fires every 1000 ms (tutorial_PERIOD_MS =1000)
...
You might see some invalid messages from the terminal at first (shown in the below picture). Don’t panic, it is normal, just wait for the synchronization between the mimsy and the openmote complete, then you would see data streaming out. It is normal to wait for 3~5 minutes before the data comes out. Make sure that you don’t cut off the power of the mimsy and accidentally break the connection.
...
First add the
sensors_init()in thetutorial_init().

add the codes in the red box in the
tutorial_task_cb(). It basically reads the temperature data from the mimsy and sends it out in the separate four bytes in the payload.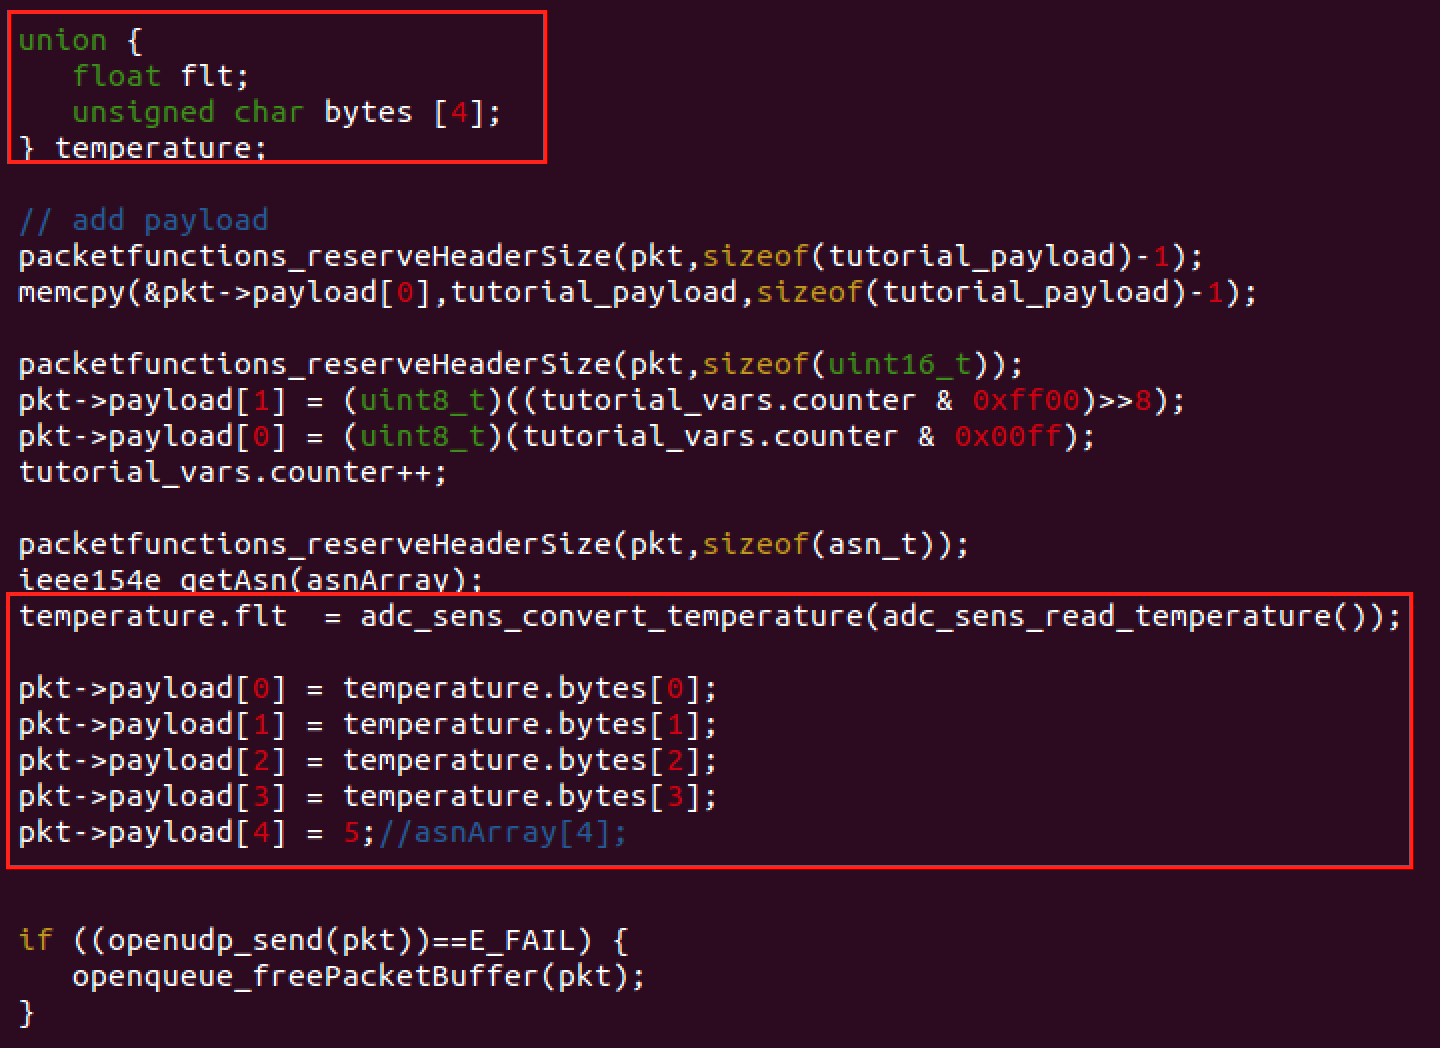
On the PC side, modify
tutorial_dagroot.pyas follows: uncomment line 219 and add the temp_data = … and print out the result.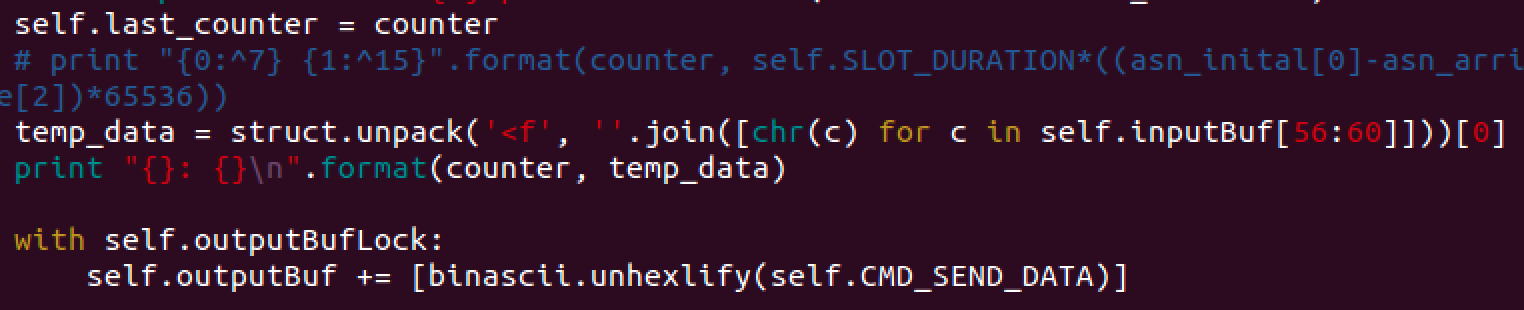
run
sudo python tutorial_dagroot.pyagain and WAIT.
Congratulation again! You know can measure your temperature using mimsy at your ease. COOL!
...