msp430gcc on Eclipse with mspgdb_proxy
Introduction
This tutorial describes how to install and configure mspgcc, msp430-gdbproxy and Eclipse to program and debug MSP430 microcontrollers on Windows.
The resulting setting is functional but debugging long code is slow. For a better solution look at msp430gcc on Eclipse with mspdebug
What is needed?
- Windows XP, Vista, 7 or later.
- MSP430 USB FET Programmer
Step 1: Download
- download Eclipse CDT for C/C++ developers from here
- download the msp430 toolchain from Mingw here
- download msp430-gdbproxy: go to here and download msp430-gdbproxy.exe
- msp430.dll and hil.dll are two libraries needed if we want to be able to debug. The most straightforward way to get them is to download and install the evaluation version of IAR for MSP430.
- download the IAR KickStart from the Texas Instruments website from here and install it with the evaluation key that limits the amount of code you can compile
- Once installed browse to C:\Program Files\IAR Systems\Embedded Workbench 6.0 Kickstart\430\bin and check that the files msp430.dll and hil.dll are there.
Step 2: Install
- Unzip eclipse file into some folder you like eclipse to be.e.g C:\eclipse
- Open the zip file of mspgcc and unzip the contents to C:\mspgcc
- Copy the msp430-gdbproxy.exe file to c:\mspgcc\bin
- Copy the msp430.dll and the hil.dll file from C:\Program Files\IAR Systems\Embedded Workbench 6.0 Kickstart\430\bin to c:\mspgcc\bin.
Step 3: Test
- Connect a telosb, gina or z1 board to the MSP430FET and connect the FET to your PC
- Open a terminal (cmd) and type msp430-gdbproxy msp430 TIUSB
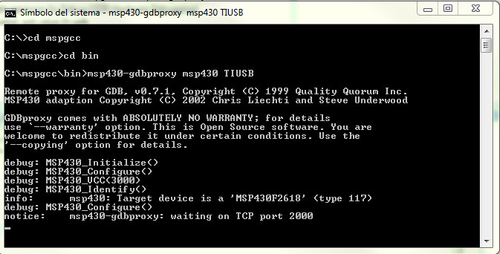
If everything went well you will see something like that.
Step 4: Setting up Eclipse
add msp430gcc to your path. This can be doen either through the windows control panel by adding a global variable or by creating a simple .bat script that setups the right path.
to create a .bat script edit an empty file with notepad and copy the following content
@echo off
set PATH=c:\mspgcc\bin;%PATH%
eclipse.exe
Save the file in the eclipse folder as eclipse.bat
start eclipse and choose a workspace folder.
- Once eclipse is running you need to add support for the compiler and GDB hardware debugging
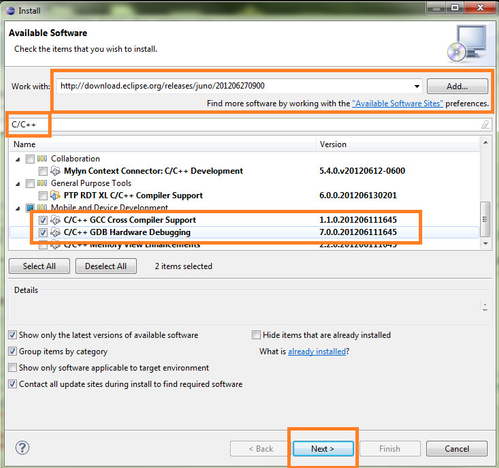
- Go to Help->Install New Software and select the following 2 updates
- Once it finishes restart eclipse
- Go to Help->Install New Software and select the following 2 updates
- Let's now create a new project to see how the toolchain has to be configured:
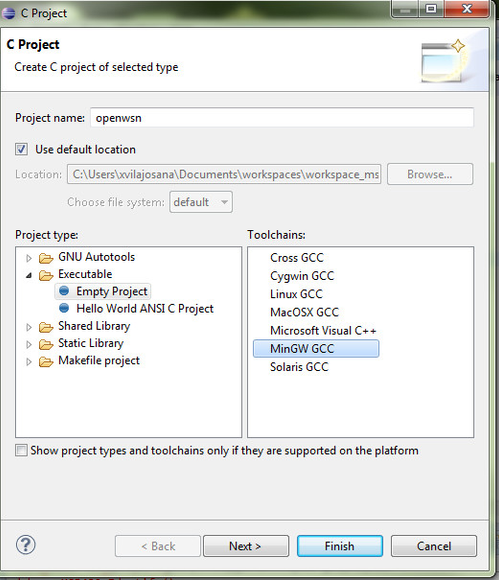
- File->New Project-> C Project
- Select Empty Project
- Select MinGW GCC
- Once the project is created. Right click on project name and choose Properties. Configure discovery options as follows
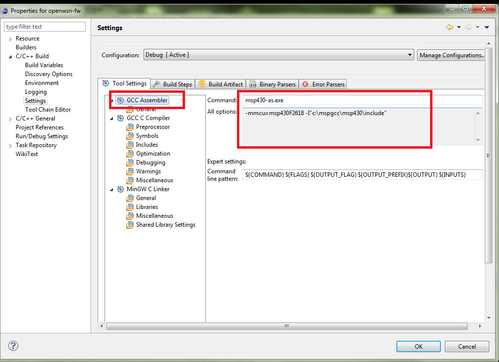
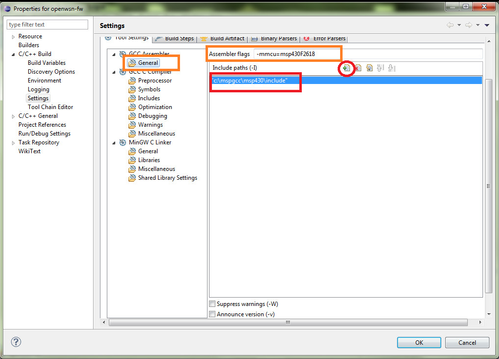
- Now we need to configure the toolchain settings. For that we click on Settings and use the msp430-as.exe assembler
- We need to make sure that we are using the appropriate msp430 configuration. In my case I am using msp430f2618 for Gina platform. (Check yours!)
- To configure the assembler options follow that capture (make sure to chose the right platform for your msp430)
- The same needs to be done for the Compiler section:
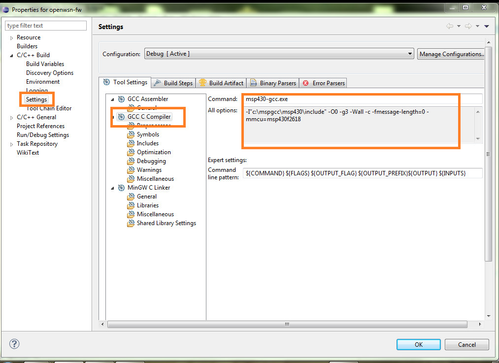
- to get to that configuration two sections need to be modified.
- In Includes make sure to include "c:\mspgcc\msp430\include" as done in assembler section
- In Miscellaneous section make sure to set Other flags to: -c -fmessage-length=0 -mmcu=msp430f2618 (select the right MSP430)
- In the Optimizations tab set the level to -O3 or to -Os if you want to optimize the code for size.
- Now the MinGW Linker section needs to be configured:
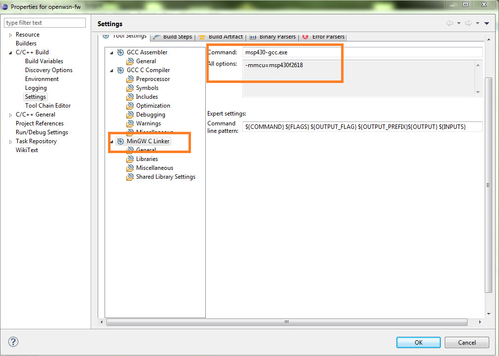
- In the Miscellaneous Section set Linker flags to: -mmcu=msp430f2618 (select the right MSP430)
- Now we will look to the Build Artifact tab and we will set extension to elf
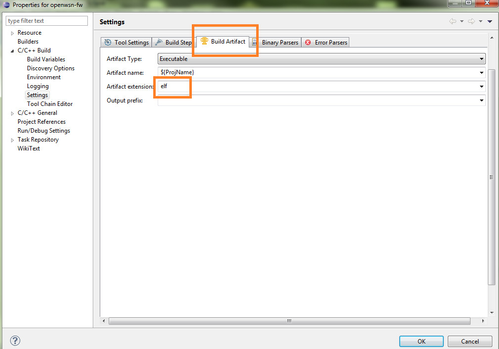
- Then the Binary Parser tab where we set the elf parser and unset the PE Windows Parser
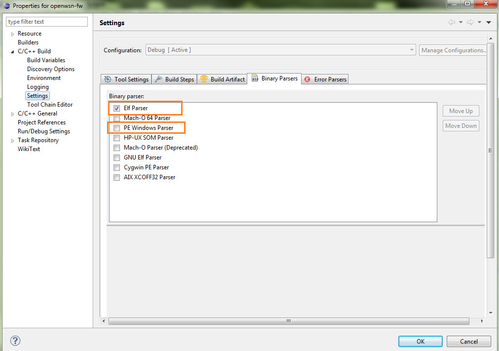
- Click OK as the configuration is ready.
Step 5: Compiling some code
- Rigth click on the project folder and select new -> Source file. Name the file e.g main.c
Copy some testing code on it:
sample code#include <io.h> #include <stdint.h> #include <msp430x26x.h> //use your msp430 configuration! int main() { // The main function volatile uint8_t i = 0; WDTCTL = WDTPW + WDTHOLD; P2DIR |= 0x0F; // do forever: while (1) { i++; if (i == 0) { //toggle red led in gina P2OUT ^= 0x08; } } }- In order to compile go to Project -> Build All or press Ctrl+B
Step 6: Debugging
- The way we debug with Eclipse consists of two parts; first we start the msp430-gdbproxy and then via msp430-gdb we connect to the gdb-proxy.
- Configure the msp430-gdbproxy: Click in the toolbar on the External Tools button and click External Tools Configurations
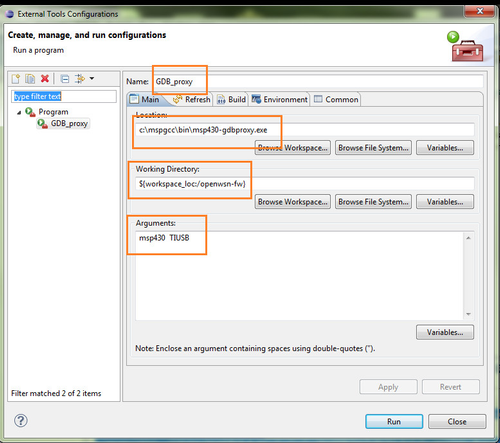
- We click apply and run. Before any debug session we need to make sure that the GDB_Proxy is running,
- To Configure the debug session so the gdb connects to the proxy follow this steps:
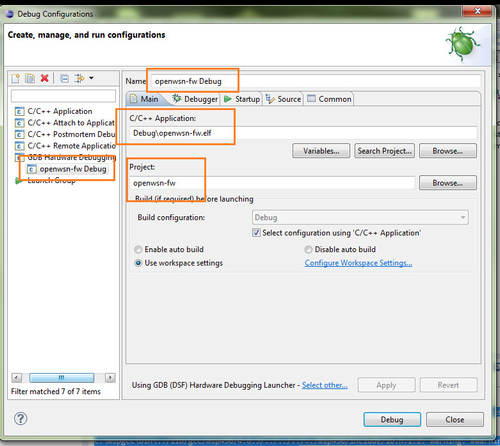
- then set the debugger options
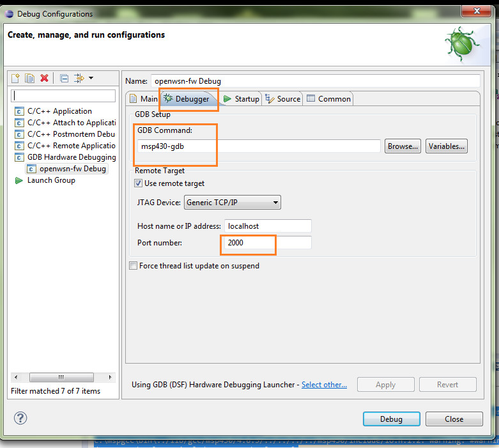
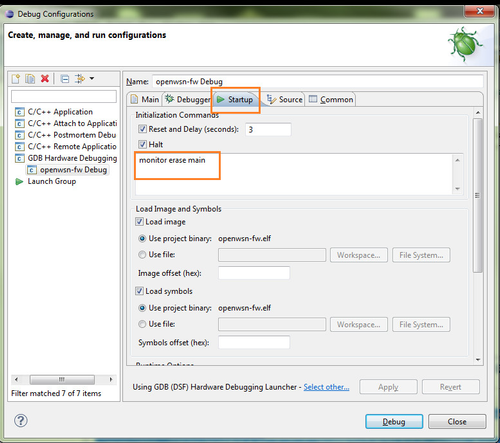
- and startup options
- Click Apply and Debug (make sure that the GDB_Proxy is running before)
- The debuger will stop at the reset vector of msp430, before running place a breakpoint somewhere in your main.c program and click run.
Known Issues
- Debugging large code is slow with the msp430-gdbproxy. Better try MSPDebug (link)
- If linker complains about the size of the code that is larger than the available ROM, use -Os compiler optimization flag.
References
